Butter (in Vitamix)
Nothing like the taste of fresh cream butter... This is my method for making butter in the Vitamix- please note that it is different from what is in the Vitamix recipe book. This is a little additional work, but I like how the butter turns out better and I feel like it lasts a little longer in the fridge. The directions look lengthy, but in total this takes me about 10 minutes to do steps 1-5, and then it sits overnight to drain. I tried to be as descriptive as possible, so please let me know if something is not clear!
Ingredients
1 pint heavy whipping cream
1/4 tsp salt (optional, adjust to your taste)
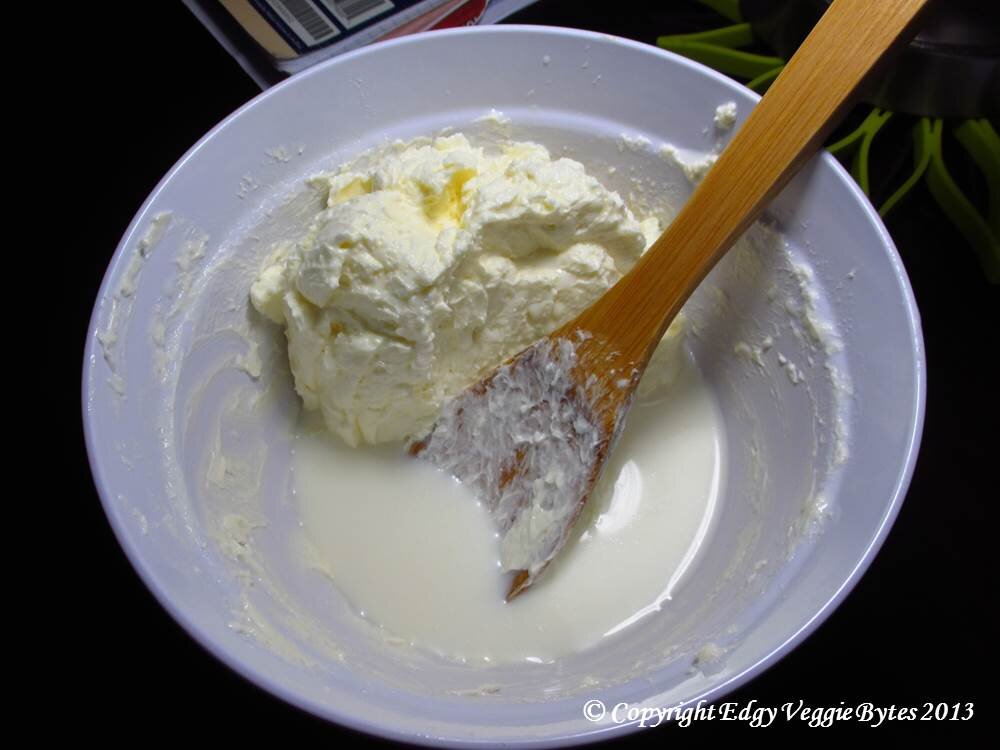
Picture 1. Butter mix right after Vitamix-ing
Picture 2. Pressing the water out of the butter
Picture 3. Ball of butter in ice water
Picture 4. Butter spread on cheese cloth
Picture 5. Butter wrapped into a block in cheese cloth
Picture 7. Final butter!
Picture 6. Weight on top of butter to press out water
Directions
1. Pour the heavy whipping cream in the Vitamix. Start the Vitamix at variable 1 and increase it to variable 10 over 10 seconds. Run the Vitamix until the mix starts popping and you begin to see sediment forming and gathering into a ball. STOP AS SOON AS YOU SEE THE BALL START TO FORM! This takes just over 2 minutes.
Visual changes I see as it runs:
Heavy whipping cream
Thick whipped cream- it stays at this phase for the longest and looks like its not moving, but it is
A little bit of liquid forming at the bottom
Liquid increases and contains small clumps of butter
Clumps of butter coming together to form a ball towards the middle of the Vitamix.
2. Pour the mix into a non-reactive bowl (glass, enamel, etc). Using a non-reactive spoon/spatula (wood, silicon spatula, etc), gently press the butter to squeeze out the liquid (see Picture 1). I try to fold it over and press as I go. As you do so, you'll notice the butter beginning to stick together even more (see Picture 2). I do this until I feel like I cannot squeeze out anymore. Tip the bowl and drain off the liquid (I save it for biscuits and pancakes!).
3. Make a large pitcher of ice water (very important, if you use regular water you may melt the butter instead of encouraging it to harden and stick together). Pour ~2 cups of ice water into the bowl. Gently fold and press the butter to "wash" it- you'll notice the water becoming cloudy. Tip the bowl and drain the water off- repeat the "washing" in ice water process until the water does not look cloudy (it usually takes me 4-5 repetitions). You'll also notice that the ball of butter that forms will float in the water. Before proceeding to the next step make sure as much water is drained as possible (see Picture 3).
4. Mix in the salt (optional).
5. Transfer the ball of butter to a cheesecloth and wrap it up (see Pictures 4 and 5). Shape it if you want (I try to form it into a rectangle shape so it's easier to cut later). Place the cheesecloth on a thick stack of newspapers (see Picture 6). Put a heavy item with a flat bottom on top to weigh it down and help the water come out. Keep it like this in the fridge overnight.
6. Next morning: Unwrap the cheesecloth and enjoy! I keep the butter in an airtight glass container in the fridge (see Picture 7).


